Saturday, December 29, 2018

Your Faithfulness


Hello Friends!!  Today I have another card made for a birthday.  It was made quite some time ago and just hadn't made it to the blog yet.  Today is it's day :-)  LOL

The scripture is a stamp from Our Daily Bread Designs.  The butterfly is from some I got a long time ago.  They actually came on stems like silk flowers but it was butterflies instead.  I still have a few left.

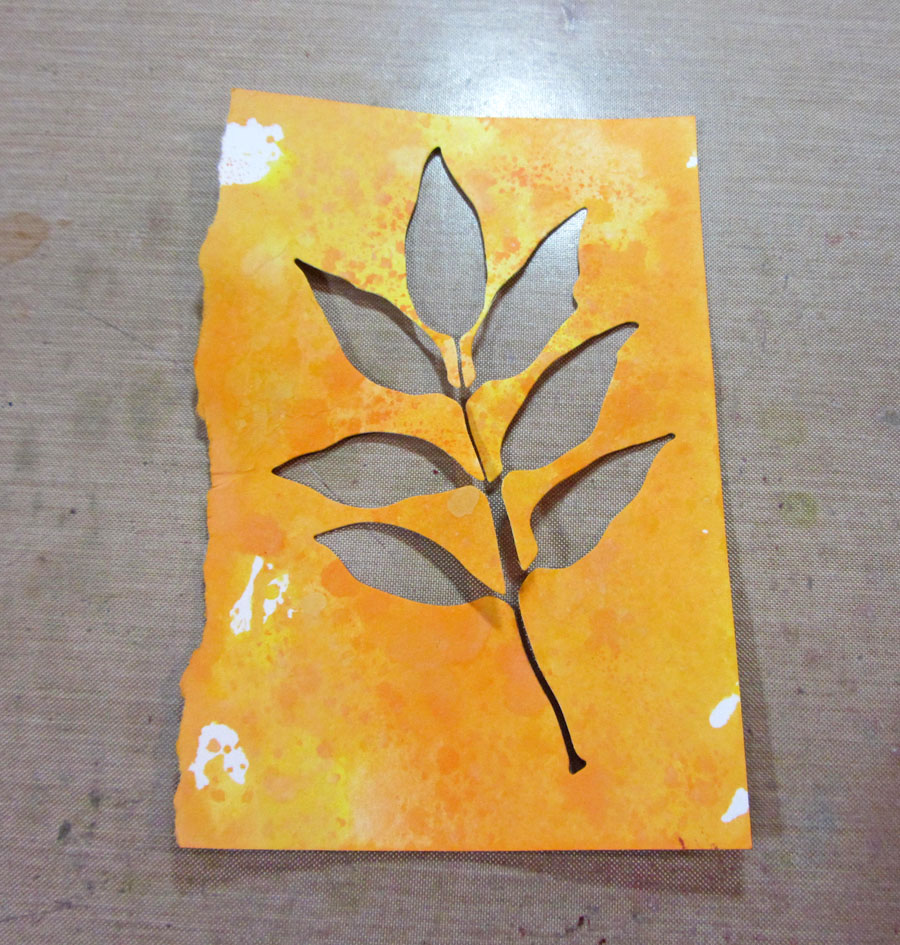
The background is a piece of linen from one of the Tim Holtz surfaces pack.  It comes with adhesive so you can just peel and stick it.  I sprayed it with Distress Spray Stain and then used Crackle Texture Paste through a Tim Holtz stencil.  This is attached to a piece of corrugate.  I used a narrow piece of the linen I had trimmed off to wrap around where the butterfly would sit. The next layer is Distress colors on white cardstock and then Mica Spray over it and gold embossing on the edges. 


Thursday, December 27, 2018

Life Doesn't Have to be Perfect to be Wonderful


A birthday card.  The background is created using the Sizzix/Tim Holz 3D Texture Fade, Distress Collage Medium Crazing, and Distress Crayons.  Around the edge is Distress Paint.  The large flower is created by punching circles from book paper, stacking up, putting a brad in the center and then crumpling up all the layers.  The other flowers are older purchased flowers with brads added to the centers. .  Cheese Cloth, thread and some die cut greenery.  Tim Holtz Idea-ology stickers for the words. 


Saturday, December 22, 2018

Happy 24 Shaker Card


A shaker card for a birthday.  Sizzix/Tim Holtz dies used - Birch Trees, Winter Wonderland, Stitched Rectangles.  Also used Distress Inks, Distress Crayon, Idea-ology pieces, Craft Thread, Dry Rock Candy Glitter.  


Thursday, December 20, 2018

One Way To Brayer A Background


Hello!!!  I'm sharing all the details of this card over on the Quietfire Creations Blog.  You can find the post HERE.  

Tuesday, December 18, 2018

Mine! You're All Mine!


Today I have this shaker project over on the Quietfire Creations blog for the Elizabeth Craft Designs December Designer Challenge. 


Monday, December 17, 2018

Snowflakes


Hi There!!!  I'm so glad you are here (or reading in an email)!!!  I am thrilled with how this card turned out!!

This piece started the whole card.  I was playing using the Mixed Media Powders from Ranger Ink.  Here I've embossed them onto a piece of corrugate from a disposable cup koozie.  I rubbed embossing ink over the ridges, added Hammered Powder and heated.  Then as my heat tool was going I sprinkled in some Punch Powder.  It's hard to take a picture of the melted powder, the reflection makes it look blurry.


This is the piece you see in the middle of my card behind the snowflakes.  I decided to cut it to a rectangle and then embossed the edges with Bone Mixed Media Powder. 


The layer under the corrugate is Tim's Metallic Kraft Paper, color Rose Gold (such a gorgeous color), embossed with his 3D Flourish Texture Fade from Sizzix.  After embossing I added Distress Paint (walnut stain) over the paper and then wiped it back leaving paint in the areas near the embossing.  Next I lightly rubbed the Embossing Ink pad over the paper and embossed with Clear Embossing Powder.  It gave an icy look to the paper - very cool.  Finally I embossed the edges with Bone Mixed Media Powder.  
The pink layer is Punch Mixed Media Powder embossed onto the edges of that panel.
The snowflakes are Sizzix/Tim Holtz (Paper Snowflakes, Paper Snowflakes Mini, Flurry 1).  Two of the snowflakes are embossed with Bone and the other with Punch. 
The word, snowflakes, is a Quietfire Design stamp from the Christmas Cuddles Word Set.   


Saturday, December 15, 2018

Christmas, Joy, Love, and Laughter


Where did the last two weeks ago!?!?  LOL   I am mostly ready for Christmas.  I have a book to make and gifts to wrap.  I'm trying for some down time in the midst of being ready.  I tried to read a magazine the other evening but couldn't keep my eyes open to do it.  I'd have gotten more accomplished if I'd just kept moving.

This card is a little smaller than a regular sized card.  The quote is a Quietfire Design stamp, May This Christmas Season.  The die is Sizzix/Tim Holtz Stacked Label.  It's great to be able to cut so many layers and have them line up so well. 


I recently got the new Mixed Media Embossing Powders from Ranger Ink and this was my first play with them.  Isn't that Scarlet gorgeous and really wonderful for Christmas. 


I had taken a picture of the very bottom layer but somehow it got damaged.  I used Texture Paste through the Tim Holtz poinsettia stencil.  While the paste was wet I added the Scarlet powder and then heated to melt the powder allowing the paste to bubble as it wanted.  It's really pretty!!!!  

So top layer is the stamped quote on kraft card and I embossed the edges with gold powder.  Next layer is the picture above.  Next layer is gold cardstock wrapped with a Christmas ribbon.  Bottom layer is the folded card with the paste and mixed media powder on kraft card.  Once I had it all put together I thought some white splatters would be nice.  I masked off most of the quote and spattered with Distress paint and a Spatter Brush.  To finish it off I used Tim Holtz Craft Thread and Idea-ology jingle bells.


Monday, December 3, 2018

Brayering Paint for a Wintry Card


Hello to you on this fine Monday :-))

I'm sharing the how to's of this card over on the Quietfire Creations Blog today.  You can find the post HERE

Friday, November 30, 2018

Autumn's Smile


So I've had this left over piece from cutting the leaf stem in my work area ever since I made the card in the previous post.  Even though Autumn is over and we had a blizzard this past weekend, I just couldn't set this aside in a pile of "this is too good to throw away but I don't have time to use it right now".  So I took time this week to actually use it.  


The leaf piece is stamped around the edges with Crackle Background (Quietfire Design) using just bits of the image.  It was stamped with Distress Ink Gathered Twigs and the same ink is sponged around the edges with a Mini Blending Tool.  The Autumn Quote from Autumn Collection (Quietfire Design) is stamped onto Vellum with Archival Ink Jet Black (Ranger Ink).  For the background piece I tore a piece of corrugated card, painted some Distress Ink Picket Fence over it, scraped on some Texture Paste, Opaque Crackle (Ranger Ink), allowed the paste to dry naturally.  Yes, patience is involved, lol.  Once it was dry I sprayed it first with some Distress Sprays in blue.  I decided I didn't like that as well as I thought I would and sp sprayed over it with Distress Spray Tarnished Brass and Mica Spray Buttercup.  There are still hints of blue.  In the top left and bottom right corners I added embossing ink using a dauber and then embossed with Seth Apter's Chunky Rust powder (Emerald Creek).  The ribbon is Tim Holtz's Crinkle Ribbon colored with Distress Spray Stains.  The thread is Tim Holtz Craft Thread.  The leaf charm is from my stash.  The tree is a button with the shank cut off. 


Wednesday, November 28, 2018

Birthdays, Old Cars, and Autumn


Hi!!!  It's good to be back on the blog today sharing another post!!  I have another birthday card, this one was created earlier in November.  The background images and car are Stamper's Anonymous/Tim Holtz images.  The sentiment is Hero Arts.  The leaf is a Sizzix/Tim Holtz die.

For the background there is Ranger Alcohol Inks on Yupo paper.  I then stamped with the Alcohol Lift-Off Ink.  Oh, how I love this ink!!!!  I stamped the tire treads onto white cardstock after lifting them from the background.  The car was stamped onto that piece using the stamp platform allowing me to stamp a few times and get the image nice and dark.  I trimmed the piece to length, tore the bottom, and fussy cut around the top of the car.  The sentiment was stamped first with the Lift-Off ink and then with black offsetting a bit.  Way cool look!!!  The leaf is die cut from white card that was dipped into Distress Inks put on a craft sheet and water sprayed.  

I'm really pleased with how this card turned out!!!  I hope you like it too!!

Hugs, Wanda


Tuesday, November 27, 2018

Sara's Stamping Techniques


Hello!!!  Today I'm sharing a review for the book, Sara's Stamping Techniques, by Sara Naumann available from Bella Crafts Publishing.  I did receive a copy of this eBook free of charge in exchange for an honest review of the book.  My thoughts and opinions are totally mine.  I'm going to also mention that as of the writing of this post, the book is on sale along with other books published by Bella Crafts.

I think the book is wonderful!!!  Sara does a fabulous job of covering the basics of stamping including videos.  She then goes on to share lots of different techniques along with cards and complete directions.

This book is an excellent source for the beginning stamper but also contains techniques long time stampers would enjoy.  I found myself wanting to stop and do various techniques as I was reading through the book.  Some techniques I had never tried and others I'd forgotten about.  I've been stamping since 1999.

Following is a card I made partly while reading Sara's book and finishing it once I'd finished the book.  I used a stamp and stencil from Sara's PaperArtsy line of stamps and stencils (specifically ESN11, ESN24 and PS091). 


Monday, November 26, 2018

You Rock Happy Birthday


Hello!!!  If you are in the US, I hope you had a wonderful Thanksgiving Holiday and Weekend!!  Our daughter and her family were able to be here but had to head back a day early as we had a blizzard coming in.  It was still good to have her and the boys (and their families) all here a couple of times over the weekend.

I'm hoping to catch up on some blogging and other things this week.  I made this card almost 2 months ago for our youngest son's birthday.  Yes, he plays the guitar (and the drums).  The stamps, guitar dies, and background paper are all from Our Daily Bread Designs.  They were all part of their Sept 2018 release.  


For the guitar, the red is red metallic paper.  The insets are die cut from Shimmer Sheetz.  It made a fabulous looking guitar!!!!!  Our son was impressed - yay!!!


Thursday, November 22, 2018

Gable Box Extravaganza


Hello!!!  And for those celebrating - Happy Thanksgiving!!!!

Over on the Quietfire Creations Blog it is all about the Gable Box and decorating it in a Christmas theme.  You will not want to miss that post.  It is chocked FULL of gorgeous projects!!!

The box I made is very simple but oh, so pretty.  I cut a piece of white cardstock large enough for the cutting die.  Onto that cardstock I lightly brayered Fresco Finish Chalk Paint (Candy Floss & Guacamole).  After the paint was dry, I die cut the Gable Box. Next I stamped the background holly leaves with Archival Ink and roughly colored them in with Distress Markers.  I left the bottom flaps of the box and the flaps with the heart cut out mostly free of leaves.  I stamped the "25" with black ink and the 2 holly leaves on either side with a darker green ink, colored in the leaves and added Stickles to the berries.  The Small Merry Christmas was die cut from gold cardstock and attached wrapping the extra around the corners and adhering well.  You could choose to not wrap the extra and leave it loose from the box. 


Monday, November 12, 2018

Foiling on the PaperArtsy Blog


It's all a Foiling on the PaperArtsy Blog for the current topic.  I have a post over there sharing some of my favorite ways to use foil to create three Christmas cards using stamps from Sara Naumann.  You can find the post HERE

A Quick and Easy Christmas Card With Zing


A quick and easy Christmas card over on the Quietfire Creations Blog.

Thursday, November 1, 2018

Balloons


Hi There!!!  This card was created for a custom order.  The person who ordered it gave it to a friend of hers to commemorate an event in her life.  All those balloons, a total of 41, have significance, even the red one.  

It was a real joy to create this card!!!!


I die cut the balloons using the balloon from the Mini Crazy Birds & Things Set (Sizzix/Tim Holtz) and then shaped each one using a soft mat and a stylus.  The scripture is a stamp from Our Daily Bread Designs.